Overview
The NewTek LightWave 3D 11 Full Version offers a user-oriented workflow for 3D motion graphics and visual effects creation. Featuring advanced modeling, animation and rendering tools, LightWave can be used for film, TV, architecture, design, information graphics and video games.
The LightWave mantra is "Technology Serves the Artist." LightWave tools and features are designed to let you focus on your art, your deadlines, and your budget; but on your art especially -- out-of-this-world 3D graphics: grass growing the length of a skyscraper, elephants stampeding into one another, spaceships roaming the universe, a car key tied into a knot, a shoot in Toronto looking like one along the canals of Amsterdam. Any idea you can dream up, you can create.
Hundreds of famous projects have been made, at least in part, with LightWave. Some of the most popular include Titanic, the Aviator, Avatar, Dr. Doolittle 3, Corky Romano, CSI, Dexter's Lab, the "Got Milk?" commercial, Aerosmith's "Fly Away" video, and X-Men: The Ravages of Apocalypse video game.
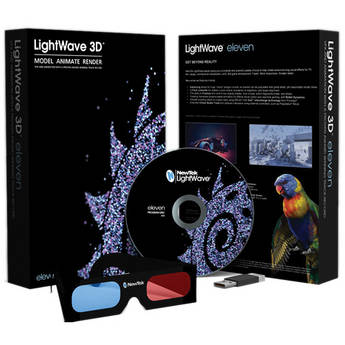
LightWave 3D 11 is the most advanced and feature-rich version of LightWave ever. The interface has been enhanced over the previous version's. New features are abundant. In fact, only some features, like Bullet Dynamics, have been retained from the previous version (and even Bullet Dynamics has been upgraded). A full electronic manual is included for download and is also available at the press of the F1 key. LightWave is compatible with both Macs and PCs, and this full version comes with installation discs, 3D glasses and a USB dongle that activates and stores the software license.
Features
Instancing
Instancing lets you create mass duplication of objects in a scene, with very little overhead. Previously, you would simply run out of memory. Now, with the ability to have huge 'virtual' polygon counts, artists can populate their scenes with incredible detail, and yet retain reasonable render times.
While instances can be thought of as clones of the original source objects, they don't need to look identical. They can be randomly scaled, positioned, rotated and even surfaced completely different from the source. This means you can use instancing for any number of uses.
Flocking
Use the Flock controller, which calculates crowd avoidance of neighbors, target alignment, and cohesive attractions, to create realistic natural motions, with ease. These are the three elements of any flocking system.
Classic examples of flocking motion are:
Flocks of Birds
Schools of Fish
Swarms of Insects
Animal Herd Behaviors
Craft Maneuvers (planes, alien ships, etc)
Fracture
This new Modeler tool was designed specifically to compliment Bullet dynamics in LightWave Layout. It allows the artist to pre-fracture objects ready for destruction.
There are a number of different methods and associated settings to fine tune the look of the pieces as they are broken up. You also have the ability to create an Endomorph of the resulting fracture, which means you can animate the explosion, with or without using dynamics.
Weight maps can also be applied to the source object to control the density of where the fracturing takes place, making Fracture a flexible tool for creating breaking objects in LightWave.
Bullet Dynamics
Bullet is a fast, production proven, open source physics engine that is used in many high profile, effects-driven films and real-time game engines. Bullet features 3D rigid body dynamics originally created by Erwin Coumans.
LightWave 11 features the Bullet dynamics engine directly in Layout so that it can be used with the new Fracture tool in Modeler to create compelling physics-based animation. Things like collapsing buildings, explosions, and even natural placement of items in a random pattern, would otherwise be difficult to do by hand.
Virtual Studio Tools
The Virtual Studio Tools first made an appearance in LightWave 10, as a way of using third party controllers to animate items in your scene.
LightWave 11 continues to expand on this concept by allowing more controller types, such as the affordable Playstation Move. These third party controllers use the new SDK available for the Virtual Studio Tools, which now allows developers to hook into the system directly.
Using the new Control Booth and Device Managers in VST, users can now manage every aspect of how their controllers are configured, and how they are used within LightWave. Essentially, anything that can be animated in LightWave can be controlled, using any device.
It is also now possible to modify how the data input is manipulated as it is captured into LightWave, using the Node Editor. This allows for complex logic to affect the input. Once a virtual performance is captured, the data can be edited in the Graph Editor, letting you hand edit any live-captured performances.
Virtual Studio Tools in LightWave 11 is a significant evolution of this technology, and with the new SDK, third party developers can extend and enhance it even further.
Interchange Tools
GoZ is an interchange technology from Pixologic that allows applications to send model and texture data to and from ZBrush for sculpting detail on a base mesh. It has proved incredibly popular among many 3D artists. Now, LightWave 11 brings that technology to you.
The GoZ implementation in LightWave Layout and Modeler is robust and fully featured. It allows you to exchange model data, along with all the associated texture maps. The Modeler implementation even lets you use ZBrush for sculpting Endomorphs for things like facial morphs.
GoZ now allows LightWave to be even more integrated within studio pipelines, making it a great addition to the LightWave 11 toolset.
Render Buffer Enhancements
Saving and viewing the various buffers produced by the render engine to make up an image, is now more powerful and much easier in LightWave 11.
The new Compositing Buffer Export panel now makes it possible to select which objects are to be included with the buffers you specify, and easier to select which buffers are to be exposed for saving or viewing.
This makes rendering out for compositing much more streamlined, as it combines and extends the functionality of two different panels you had to visit in previous versions of LightWave. It also allows saving of presets for the commonly used buffers to aid in setting up for output, something that was not possible before.
Python Scripting
Python is an industry standard programming language prevalent in most CG pipelines. The inclusion of Python in LightWave 11 allows even further integration of LightWave into studio pipelines, as those familiar with Python can quickly begin writing tools for LightWave.
FiberFX Enhancements
FiberFX now has a new volume rendering mode. "Stroke" is the original shading method for volumetric rendering. When set to "Solid," the user can apply shading and material like any normal surface. This lets you create very complex looking fibers, easily, and perform parametric cylinder rendering of the fibers.
FiberFX volumetric rendering has also been enhanced with smooth line rendering to match the pixel filter look, as well as render buffer support for all fiber types.
New optimizations that make the building and relaxed distribution of fibers multi-threaded, give you faster render times and interactivity when working with fiber setup and styling. Additionally, the FiberFX instance accelerator demonstrates benchmarked rendering improvements of 2x for complex situations.
FiberFX has also benefited from the new instancing system in LightWave 11. Volume mode now uses the new built-in instancing system. The old FiberFX Instancing Tab is no longer needed and has been removed.
FiberFX has also been given enhanced nodal support in the following areas:
Instance Info node now works to change color on FiberFX instances in Solid volume type
Added support for nodal color input to the stroke or ribbon type of volume rendering
Add nodal color UV texture mapping support for volume stroke rendering, including smoothing
Add nodal color UV texture mapping support for rasterized fibers, including smoothing
Add alpha input into FiberFX node editor
Add alpha mapping support for texture mapping
User Interface
Search
The list of available nodes can now be searched to find a specific node more quickly. There are also options for case-sensitive searching and flat list results (the matched nodes will appear in a flat list as opposed to a hierarchal list showing the node group they are located in). There is also a quick option to clear out a search and get back to the full list. All of these options are found in the popup menu to the right of the search field.
Adding Multiple Nodes
The addition of the node tree list means that multiple nodes can be added all at once, rather than one at a time. Simply select the nodes you need and click the Add Node button. Alternatively, click the first node, hold the Shift or Ctrl key (depending on the type of selection you are doing - contiguous/non-contiguous), and double-click the last node. The previous way of adding nodes via the popup menu is also still available. The small drop down arrow next to the Add Node button is where the original node menu is located.
Many options that affect the final render are located in a number of panels. Previously the user had to switch panels often to check all of these settings. In LightWave 11, the main panels have been grouped together for quick access within the same panel.
The Render Properties panel now hosts the Camera and Light options. The shortcuts for opening these panels are still the same as in previous versions of LightWave, so your workflow will not be disrupted. But checking your render settings is now much easier with all these items in one panel, under their respective tabs. The Render Properties panel can now also be accessed by the shortcut Ctrl p.
Faster Access to the Morph Mixer Interface
The Morph Mixer plug-in is especially important for character animators, but was buried away in a large list of plug-ins. On the Object Properties panel under the 'Deform' tab, there is now a button to quickly add and access the Morph Mixer interface.
IK Evaluation Optimizations
Performance has been improved for the IK rigs to speed up character animation, allowing for easier and smoother posing while working. Also GLSL speed in Layout is improved.
Scene Loading Speed Optimizations
A huge speed boost has been added to Scene and Object loading, in some cases - 7x faster.
Modeler Optimizations & Enhancements
Multi-Layered Object is now much faster to work with than previous versions of Modeler.
Off-Axis Alignment
Items can now be modeled off-axis and automatically aligned to the origin. This allows details to be added, such as bolts or nurnies to be placed and aligned to a complex surface.
Shadow Catcher Node Material
Shadow Catcher allows comping of shadows and even reflections onto a background plate by rendering to an object that is modeled to match the 'real' ground in the background. The Shadow Catcher node then only renders the shadows and reflections of other scene items, while ignoring the ground model surface. The result is believable, perfectly blended shadows and reflections in the background plate, just as if the CG elements were actually in the original photo.
Print Render Utility
Working out how big to make your camera frame size for print has long been a question asked by many. And while the math is simple, its process is ripe for automation. The 'Print Assistant' utility in LightWave has been replaced with a much more fully featured version. This version supports all major print units and has a large list of preset standard paper sizes, making it a useful update for those working with LightWave for print.
Unified Sampling
The sampling of anti-aliasing, shaders, and lights has undergone a significant change to a more advanced unified sampling system. The result means better quality sampling, often at lower render times.
The new system results in changes to the anti-aliasing, with 'Samples' and 'Quality' settings located around the interface. They are all now using absolute samples and are located in only two places: the Camera and Render Globals panels. Previously light quality was calculated as a squared value. For example, if the user entered a value of 4, the actual number of samples taken would be 4x4, which equals 16.
Nodes handled things slightly different, they would try to get as close to the absolute number of samples entered, but sometimes might not be able to. These areas are now on equal footing, which means they work together for a better image quality.
VPR Enhancements
VPR now allows the ability to select a surface by clicking on the object in the viewport, which then brings up the surface editor with the surface highlighted. This new functionality makes it much easier to make modifications to surfaces. Lens Flares are now supported directly in the VPR, also the unified sampling updates are also present in the VPR which give improved quality.
HyperVoxels Blending
The Metaball blending method for HyperVoxels has been re-implemented and can be used with all HyperVoxel types. Rather than just retaining the two former preset choices (Metaballs 1 and Metaballs 2) the implementation has been revised to allow for control of the algorithm via a percentage entry field and animation of the value using Envelopes and Textures.
OBJ I/O Enhancements
The OBJ file format is now more robust, supports a wider range of material tags, and loads faster to optimize I/O with other external applications.

 BLACKMAGIC DESIGN
 Đèn quay phim Aputure
 Micro Deity
 Phần mềm Magicsoft
 Bàn chỉnh màu Tangent
 Thiết bị dựng phim
 Phần mềm Video
 Thiết bị lưu trữ
 Video Pro


